By : Simon Slangen
When you buy a new computer – like I did recently – you’ll want to transfer most of your existing files over to the new computer. A lot of people, who spend their time gathering vacation pictures and family videos, will want to make a big move leaving nearly nothing behind. Others, like myself, only keep the essential stuff; some documents they’re still working on and a few application installations they’ll be needing shortly. No matter how much you plan on taking along, you want to do it quickly. Spend the minimal amount of time before you can cut that old hardware loose. There are a number of ways to do this, and we’re taking a look at five of the ways how to transfer files from one computer to another. Depending on what you’re working with, some might be better than others.
Use An External Storage Media
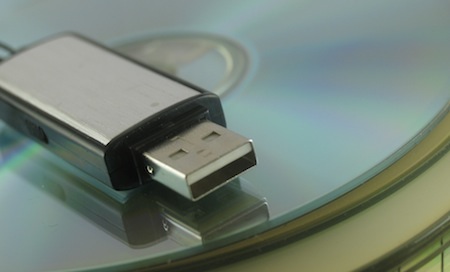
The standard way of backing up data. These days, everyone has a USB stick, or a at least a computer that can burn CDs and DVDs. An even better alternative are external hard drives which you can connect over USB – these often combine crazy speed with incredible storage.
When you buy a new computer – like I did recently – you’ll want to transfer most of your existing files over to the new computer. A lot of people, who spend their time gathering vacation pictures and family videos, will want to make a big move leaving nearly nothing behind. Others, like myself, only keep the essential stuff; some documents they’re still working on and a few application installations they’ll be needing shortly. No matter how much you plan on taking along, you want to do it quickly. Spend the minimal amount of time before you can cut that old hardware loose. There are a number of ways to do this, and we’re taking a look at five of the ways how to transfer files from one computer to another. Depending on what you’re working with, some might be better than others.
Use An External Storage Media
The standard way of backing up data. These days, everyone has a USB stick, or a at least a computer that can burn CDs and DVDs. An even better alternative are external hard drives which you can connect over USB – these often combine crazy speed with incredible storage.
There are three back-up patterns you can follow. Often the easiest way is to create categorical folders to put your files in – movies, pictures, documents, applications, and so on. Back on your new computer, you can easily put these wherever you want to have them.
A duplicate copy requires even less effort, but you’ll be passing up on an excuse to (finally?) categorize your data. Just copy the folders your files are in – Desktop, My Documents, etc. – and you’ll be able to merge them with your new system’s counterparts.
Too lazy to do it manually? You can always use back-up software suites to do the work for you. These are often able to return your file to right location on your new disk, but are especially useful if you plan on doing periodical back-ups (e.g. every two weeks).
Share Over LAN
You can also use your existing home network to transfer your files, given that both of your systems are connected. The speed can vary from ‘incredibly fast’ on a wired network to ‘pretty damn slow’ on a wireless one.
First and foremost, you’ll need to enable the sharing of your hard drive. In Mac OS X, just go to System Preferences -> Sharing, and the rest is pretty obvious. In Windows, the process is quite easy as well. Browse to My Computer -> (right-click) Properties on your hard drive. In the Sharing tab, you’ll need to enable file sharing for the folder. Below is a screenshot of how it looks like on a Windows 7 PC.
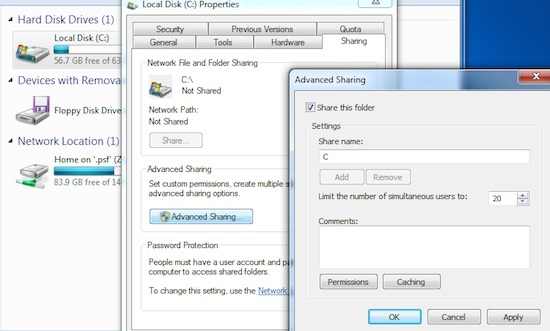
Vista and 7 — If your disk isn’t Shared, go to the Network and Sharing Screen and open the ‘Advanced Sharing’ settings. Here you’ll be able to turn on File and Printer Sharing.
Got everything set up? On your new system, you should be able to find the drive shared in ‘Network’. When opening the hard drive, you’ll probably be asked for a password. From there on, you’re free to go. Copy the files and folders as if the network drive is just another folder.
Got everything set up? On your new system, you should be able to find the drive shared in ‘Network’. When opening the hard drive, you’ll probably be asked for a password. From there on, you’re free to go. Copy the files and folders as if the network drive is just another folder.

If you don’t have a home network, or don’t feel like using your wireless one, you can directly connect two computers with a crossover ethernet cable. This one looks exactly the same as your everyday internet cable, but has a slightly different wiring. You can buy these for a few bucks in most hardware and computer stores.
Use an EasyTransfer Cable
Windows Easy Transfer is a new application that comes installed in most newer Microsoft Windows operation system. One way to use the program is with an EasyTransfer cable, a special double “male” USB cable.
Use an EasyTransfer Cable
Windows Easy Transfer is a new application that comes installed in most newer Microsoft Windows operation system. One way to use the program is with an EasyTransfer cable, a special double “male” USB cable.
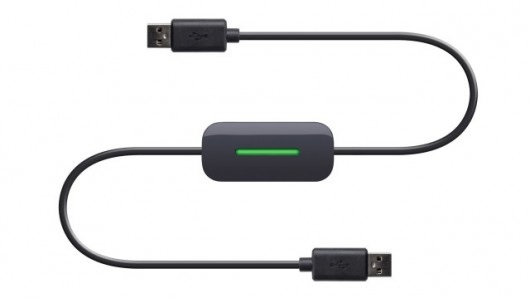
The cable, that can be bought online and in computer stores, facilitates file transfers between two Windows systems and works great for our purpose. If you don’t mind spending the extra money, this is an option you might want to consider.
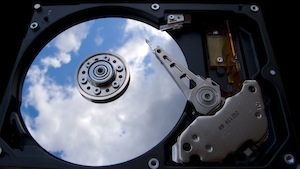
Connect the HDD Manually
This is the way I ended up doing it – the geeky way. If you don’t have an external HDD casing, why not make one? By taking out your old hard drive and using the right connections, you’ll quickly have it hooked via USB to your new system. This has a number of advantages – the speed is well enjoyable, you don’t need (much) extra hardware, and you can copy the files straight from point A to B.
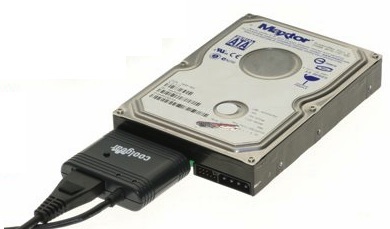
All you need are (depending on your hard drive model) a SATA to USB or an IDE to USB adapter. These can be bought separate or together with an external hard drive casing – which is often even cheaper. If you’ve got an external drive of the right type lying around, you can even use the casing from that one, and spare yourself the extra costs.
 RSS Feed
